Gluten-Free Cardamom Quinoa & Oatmeal Cookies

Gallery

This gallery contains 3 photos.

I’ve been eating trying to eat just gluten-free foods the past couple of weeks. I haven’t put my whole family on it yet, as we are such bread and pasta loving individuals.  I’m finding it difficult to find a really good gluten-free … Continue reading

Pumpkin Cream Cheese Frosting

This time of year pumpkins and winter squash are in season and there are so many wonderful ways to use them.  I made a few great dishes lately: butternut squash soups, ravioli, triple layer pumpkin pie, roasted squash.

One quick treat I make is pumpkin muffins with the Trader Joe’s Pumpkin Bread mix.  They’re quick and easy to make and all the kids love them.  I had an event to go to so I got an idea to jazz them up a bit by making a frosting and turning them into cupcakes.  I adapted a recipe I found for cream cheese frosting.

Pumpkin Cream Cheese Frosting

1 brick cream cheese (cold)

1 stick unsalted butter (room temp)

¾ cup confectioners’ sugar

2 Tbsp pumpkin

1 tsp vanilla

¼ tsp cinnamon

⅛ tsp ground ginger

In food processor blend the cream cheese and butter.  Add the confectioners’ sugar and blend until smooth.  Add rest ingredients until well mixed.  Frost cupcakes/muffins when well cooled.

They were delicious!  Great easy treat and most kids liked them. 

Treat Them Well

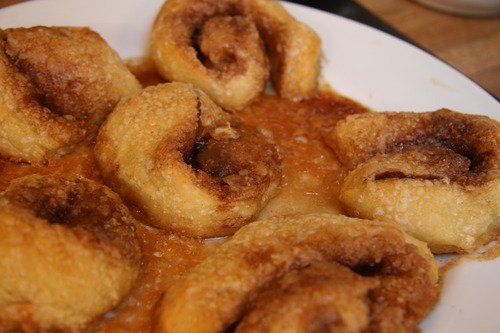
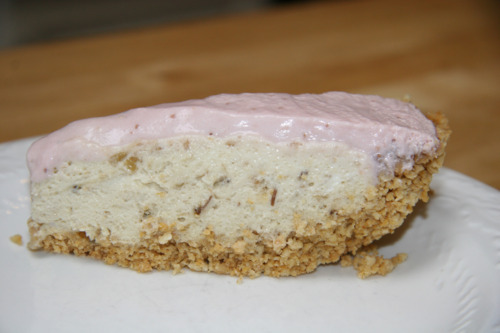
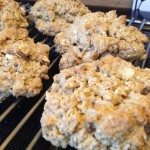
Wondering why I insist on baking with so many disasters?   It’s not masochism; it’s my way of ensuring the ingredients are what I don’t mind my kids ingesting.   Plus I do get some fabulous results.  My mother’s birthday is a week after my son’s and they both fall around Thanksgiving.  Mum was visiting my brother in California for Thanksgiving so I promised to make her birthday dinner upon her return.   The dinner, a grilled Moroccan leg of lamb with Moroccan spices was enjoyed by everyone but my mother (because of the grilled part), was similar to the lamb my husband made for our potluck dinner over the summer.  But she loved the pie I made for her.  I took the banana cream pie I created the crust for, altered it slightly and added a layer of strawberry chiffon to the top. Plus only the crust is actually baked.    

So, if you’ve read my blog you know I am into feeding my children healthier options but try not to go overboard especially on attempting to be perfect.  I realize the balance that I desire so that my kids have healthier options while trying to keep our psyches in check.    That said, many people are surprised that I let my kids have the occasional junk food and also that I let them have cakes, cookies, ice cream, etc.  I keep the junk to a minimum and what I care about most is the ingredients in those treats. 

That’s why I’ll often make desserts so they don’t have the stuff I do avoid (pesticides, growth hormones and artificial colors).  I haven’t had to worry about weight issues with my kids or me (yes, I put on more than the freshman 15 when I went away to university, but it dropped quickly when I returned to eating better foods) so that’s one reason why I don’t deny them treats.  I do insist they eat their main course before getting dessert and I try to limit snacking, but I’m not a tyrant about it.  I believe that in healthy eating and keeping active keep people naturally fit.  So go ahead, have and serve your desserts, just remember they’re treats. 

This pie is not for the faint of heart.  It is full of cream, but oh so delicious.  It also takes some time to make the banana filling layer but don’t rush and you’ll be rewarded later. Heavenly.

Banana Strawberry Cream Pie

Crust

2 1/2 cups Banana Nut Cheerios

2 1/2 cups Strawberry Yogurt Cheerios

1 stick butter, melted

In food processor chop the cheerios until crumbs.  While processor on, pour in melted butter through spout until well mixed.  Press into pie plate and bake for 8 minutes at 350F.  Set aside to cool.

Banana Filling

Find here. 
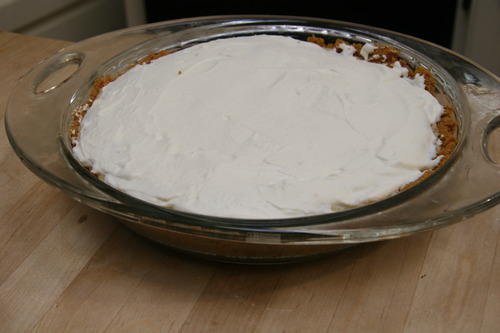
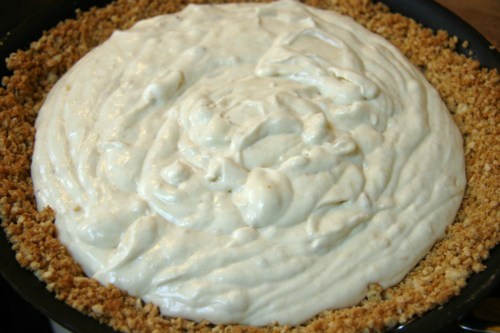
Once poured into pie crust, let set in fridge while you prepare the strawberry chiffon.

Strawberry Chiffon

12 oz frozen strawberries (organic)

1/3 cup sugar

1/4 cup water

1 1/2 cups cream, whipped

2 tsp gelatin

2 Tbsp cold water

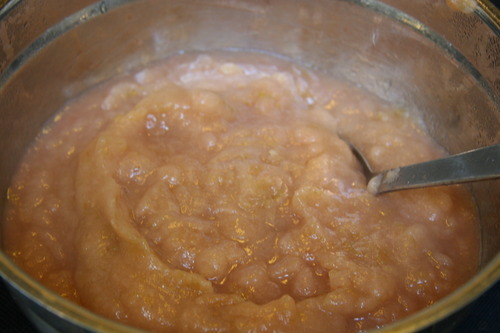
In a small bowl sprinkle gelatin over 2 Tbsp cold water.  Let sit.  Whip cream and set aside.  Over medium high heat cook strawberries until they’re starting to break down. 
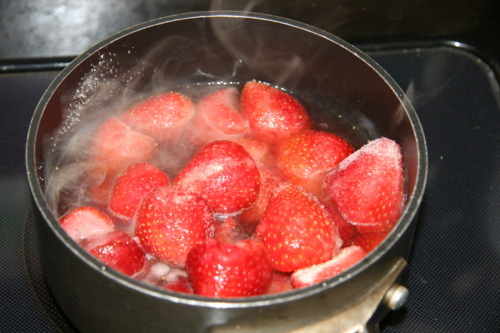
Use potato masher to puree.  Strain seeds out.  Pour into a metal bowl and place bowl into a cold water bath then whisk in gelatin and fold in whipped cream.  Chill for 10 minutes then using a spatula spread strawberry chiffon layer onto the top of the banana layer. 
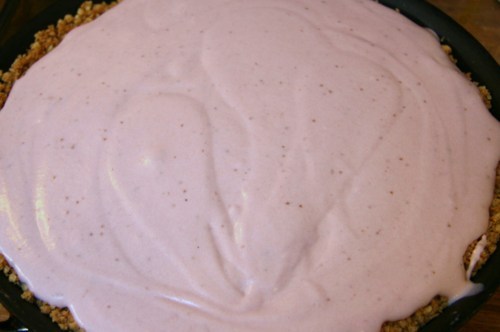
Serve or chill until ready to serve.

My kids were so excited about this during and after its creation.  My mother loved it and I had some left over for when a good friend visited the following day.  It was a hit with all and a perfect treat.

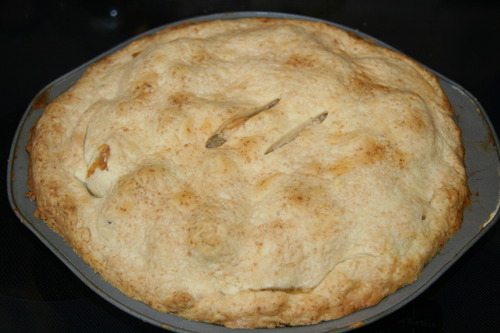
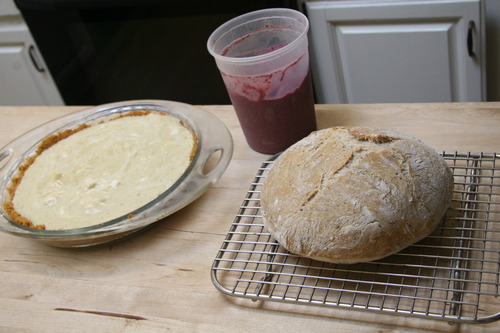
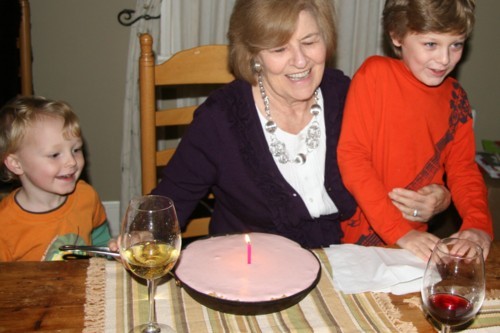
  If you notice— pie plate was a sauté pan.  I had the triple layer pumpkin pies in my only other two.

Manic Kitchen Maniac Part I (apples)

Some days I can cook lots and lots of things in one day, if I set some time aside that is.  Yesterday was one of them.  We had been given a huge bag of apples from my son’s preschool teacher (her trees were dropping them faster than she could collect them) so I decided to make apple pie.  And apple sauce.  And cinnamon rolls earlier from a white dough I’d started the day before plus one loaf of spelt-white bread and a little boule from the left-over white dough.  And then I thought, why stop?  Since I’d already roasted a butternut squash the night before, and didn’t make them then, I  decided to make raviolis to bring to a friend’s… plus it was nicer than sorting and folding the laundry piled up on my bed.  

The cinnamon rolls I made from a Mark Bittman recipe using the bread dough that I often make; but I think next time I’ll use a different dough, either making it flakier or chewier.  It just wasn’t right, or all that wonderful, so that’s a fail on my part, but the kids still liked them.  Not many kids wouldn’t— they were warm, sweet and cinnamon-y.   But to get them out of the way in my little kitchen of the other baking and cooking, I threw them in the oven, which I reheated for bread and pie.  Oops.  The photo is post reheat. 

Since I had the Mark Bittman How to Cook Everything cookbook out, I used it for my pie crust and as a basis for the ravioli filling. So after cinnamon rolls were made and bread was sitting on my island getting in its last rise, I started on the pie crust.  The recipe was fairly easy using my food processor, although I must have put my dough into the freezer longer than the time suggested in his recipe since it was too hard from to work with easily (rolling) and it just added time and frustration.  Luckily I wasn’t doing my PMS induced Mommy Dearest impression, that was a day earlier, I was much easier going in— except for the fact that I was in a cooking frenzy, it was still a happy go-lucky frenzy.  When I was finished mixing the crust dough I put the bread into the oven and started on making the pie filling.  I have been making apple pies for several years and use my own recipe (but I’m sure it’s just like many others). 

Apple Pie Filling

  • 6-8 apples depending on size (using Macintosh-type use 8, Granny Smiths 6)
  • 1/4 cup brown sugar
  • 1/4 cup white sugar
  • 1 tsp cinnamon
  • 1/2 tsp fresh grated nutmeg
  • pinch of ground ginger
  • 1/4 tsp salt
  • Tbsp flour
  • 2 Tbsp lemon juice (plus more in water for keeping apples from browning)
  • 1 Tbsp butter cut into small pieces

So that the apples will keep their lovely color after I peel them I put them in a bowl of cold water with some lemon juice squeezed in and the piece from which it came.  After peeling the apples, I cut them in half and scoop out the core with a melon-baller and cut out the ends in a triangle cut. I find it retains the most apple and creates even sized wedges for the pie.  Once apples are peeled and cut, in a separate bowl mix the spices, sugar and flour.  Toss apples with spice mixture, add lemon juice then pour into the crust.  Add small pieces of butter around the top of pie filling. Add top crust, pinch closed (brush bottom crust with water to help seal) and score to release hot air.

I baked this one at 350 for 15 minutes then increased temp to 450 for 20 minutes then back down to 350 for last 20 minutes only because I had forgotten to start it off at higher temp until 15 minutes in!  You can bake it at 450 first then lower it for rest of time. 

While pie was in the oven and bread was on counter cooling (I’d taken them out just minutes before pie went it) I made the apple sauce.  My mother-in-law taught me how to make it and it’s the best I’ve ever had.  I cut about 12 apples into chunks, leaving out core and ends but leaving on the peel, and placed in a large sauce pan.  Add 2 tbsp water, 1/4 cup of brown sugar/white sugar and  1 1/2 tsp cinnamon.  Mix well then cover.  Heat over med-high heat for about 7 minutes, stir and reduce to med-low heat.  Stirring often, cook apples until they’ve reduced in size and are mushy, about 20-25 minutes.  Place a food mill over a bowl, pour cooked apples into mill and grind them through.  Ready to eat!

Now at this point I was hemming and hawing over laundry or continue cooking, but since I had the food mill out and I really wanted to attempt making them (plus some encouragement from friends over facebook), I stuck with cooking and made the ravioli. 

To be continued…

Accidental Baker

As I’ve mentioned before I’m not much of a baker, but I seem to be doing my fair share lately.  I attribute some of it to getyourbakeon!, some to actually finding out how easy it is to bake delicious artisanal bread, and some to my natural curiosity when it comes to creating things that I think would go well together.  I often cook this way too, occasionally it’s because I like certain combinations of flavors or that I’ve had some dish in a restaurant and I try to replicate it — even if it’s not the exact ingredients, it often doesn’t matter because it usually works out well.  

I recently bought the kids Banana Cheerios thinking they’d like it, but they don’t.  So, what to do with the box?  Throw it away?  Then two days ago I figured out what I would  do with it.  I had a party to go to yesterday and needed to bring something.  I had some overripe bananas and decided to make banana cream pie with the Banana Cheerios as the crust.  I had never seen or read about using them, just thought they’d make a good one.  I looked up some recipes for graham cracker crusts and other cookie crusts, so I got the general idea of what to do. 

The filling isn’t as easy as pie, but if you have some time and an instant read thermometer(I suggest you get one if you don’t— best way to figure out if your chicken or steak is done), it’s doable.   I found some recipes (Icebox Pies by Lauren Chattman was my main source) and then adjusted them to my preference. 

         Banana Cream Pie  

  • 2 Tbsp cold water
  • 2 tsp of gelatin (about 2/3 packet)
  • 3 eggs
  • 1/2 cup organic cane sugar
  • 3 ripe bananas mashed
  • 1 1/2 cups heavy cream
  • 1/2 tsp sea salt
  • 2 tsp vanilla (separated into two 1 teaspoon portions)
  • 5 cups Banana Cheerios
  • 1 stick butter, melted

For the crust, preheat oven to 375F.  In a Cuisinart, use regular metal blade to chop the cheerios until they are small crumbs.  Add the melted butter and 1 tsp of vanilla.  They should be mixed until they stick when pressed together.  Pour mixture into pie plate and press to edges.  Bake for 6-8 minutes.  Set aside to cool.

In a small bowl dissolve the gelatin in water (sprinkle on top or stir in, it works either way), set aside.  Whip cream and when stiff, put in fridge for use later.  In a double boiler (metal bowl over couple of inches of boiling water) whisk the eggs and sugar together (temper) until they reach 160 F.  Remove from heat and beat in gelatin— mix for several minutes until creamy and fairly cool.  Stir in bananas, salt and 1 tsp vanilla.  Fold in 2/3 of the whipped cream. Pour into cooled crust.  Chill in fridge for an hour then use the remaining whipped cream to spread on top.

I made the bread again and also turned a failed blueberry mousse into ice cream. 


© 2010 mykidsreallyeatthis.com